Liftmaster Up Arrow Light Flashing Continuously
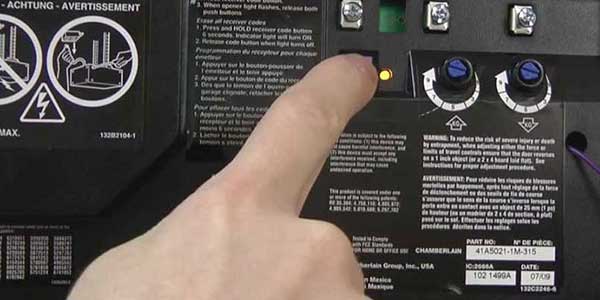
Self-diagnostic capabilities are built into your garage door opener. The diagnostic LED light next to the learn button will flash a few times before pausing and repeating, indicating that it has discovered a possible problem. So here is Troubleshooting Liftmaster garage door flashing light according to their number of flashes.
Here is a complete detail of Liftmaster Flashing Light Codes meaning
Diagnostic Chart:
The Garage Door Opener will not close the door and the light bulbs blink 10 times:
Note: Any garage door opener or replacement logic board manufactured after 2022, will no longer have this feature.
One or both of the LED on the safety reversing sensors do not glow steadily.
- One Flash: A broken or disconnected wire to a safety reversing sensor.
- Two Flashes: A wire to a sensor is shorted out or a black/white wire is reversed.
- Four Flashes: The safety reversing sensor sending LED glows steadily, and the receiving light is dim or flashing.
Inspect the sensor wires for a short, disconnected or broken wires (black/white wires reversed)
- If the home is pre-wired for a garage door opener, remove the wires from behind the wall next to the sensors. Check the connections for loose or broken wires, and replace or repair as needed.
- Check the wires at the opener, and lightly pull on the wires to verify if they are connected properly.
- Replace or reattach as needed.
Verify the Safety Sensors wires are properly connected and not reversed at the sensors (if pre-wired) or opener.
- White wires from the sensors should be connected to the #2 or White Terminal.
- White/Black wires from the sensors should be connected to the #3 or Grey Terminal.
The safety reversing sensors are slightly misaligned.
- Loosen the wing nut on the receiving sensor.
- Clean the lens.
- Realign the sensor until it glows steadily.
- Tighten the wing nut and secure the brackets.
- Verify the door track is firmly secured to the wall and does not move.
For additional support on the garage door opener not closing and the opener lights flashing, click here.
More: How to Reprogram Liftmaster Garage Door Opener
The LED or Screen on the door control is not lit.
- Inspect the door control wires for a short (staple in wire), and replace as needed.
How to Test:
- Remove the door control from the wall. Screw is located under the push bar, or under the buttons on the bottom. Refer to your product manual's installation section to verify how to remove the door control from the wall.
- Disconnect the wires from the back of the door control, then touch the wires together.
- If the garage door opener activates, replace the door control.
- If the garage door opener does not activate, disconnect door control wires from the motor unit. Short across the red and white terminals with jumper wire.
- If the garage door opener activates, replace the door control wires.
NOTE:
- The above steps do NOT work for Security+ 2.0 garage door openers, as shorting the door controls wires will not cycle the opener.
- A short wire test is NOT needed if the LED or Screen is on but not working, replace the door control.
5 Flashes
This means the opener is not detecting any RPMs (rotations-per-minute) during the first second of operation. This typically means there is a mechanical stoppage:
- If the opener isoperating normally.
- Cycle power to the opener by unplugging it for 5 seconds, reapply power to reset the error code.
- If the opener is humming forless than 5 seconds, then turns off. Check the following in order:
- Check the balance of the garage door opener
- Disengage the garage door from the opener.
- Manually lift the garage door 3 to 4 feet off the floor and release.
- If the garage door forcefully closes to the floor, or is difficult to manually open and close, contact a trained door technician to have the door serviced.
- A broken spring above the garage door
- Check the spring above the garage door, if this is broken you will not be able to manually lift open the garage door.
- Manual locks on the garage door are engaged
- Identify if there are manual locks installed on the garage door, once a garage door opener has been installed, then should be removed.
- Opener Trolley is stuck against the rail stop bolt: See How to get the trolley off the stop bolt or stop tab.
- The garage door has opened and will not close. Loosen the chain or belt to relieve the tension, then press the door control to run the trolley to the close position. Re-tighten the chain or belt without the door connection, refer to the product manual for proper tension. Once tension has been completed, reset the travel and force adjustments, followed by all safety tests.
- Bad Capacitor, Stripped Gears or a Bad Motor
- Unplug the garage door opener and remove the cover. While the cover is removed, inspect the following:
- Capacitor: If the unit is humming and the gears are good, replace the capacitor.
- Gears: If there are white shaving inside the unit, replace the gears instead of the capacitor.
- Motor: If there are no white shavings, and you have already replaced the capacitor, replace the motor. Ensure the bolts used to connect the rail to the chassis are the black bolts provided with the unit from the factory.
- Motor has overheated
- This usually happens during a new installation after setting the limits and forces, or replacing components. The opener has been ran numerous time and the motor has overheated.
- Allow the opener to reset for 45 minutes allowing the motor to cool, then continue with the adjustments.
- If the opener is humming formore than 5 seconds, (up to 30 seconds) then turns off. Check the following in order:
- Check the balance of the garage door opener
- Disengage the garage door from the opener.
- Manually lift the garage door 3 to 4 feet off the floor and release.
- If the garage door forcefully closes to the floor, or is difficult to manually open and close, contact a trained door technician to have the door serviced.
- Trolley is disconnected (about 15 seconds)
- Cycle the opener and verify if the chain or belt is moving
- If so, re-engage the trolley so the opener will open and close the garage door. Refer to your product manual on how to engage and disengage the garage door.
- Cycle the opener and verify if the chain or belt is moving
- The Chain or Belt Sprocket is broken (up to 30 seconds)
- Unplug the garage door opener, remove the battery backup if applicable.
- Remove the sprocket cover
- If a DC opener, replace the DC Motor
- If an AC opener, replace the gear and sprocket assembly
- The internal Gears are stripped (Less than 5 seconds – units with travel modules, or 30 seconds – units with RPM Sensor)
- Unplug the garage door opener and remove the cover.
- If there are white shaving inside the unit, replace the gears
- Unplug the garage door opener and remove the cover.
- Check the balance of the garage door opener
- If the opener is movingless than 6 to 8 inches (15-20 cm) the RPM Sensor may not be functioning properly.
- Disconnect the garage door from the opener and cycle the opener.
- If after disconnecting the garage door, and the opener runs more than 6 to 8 inches, check the balance of the garage door and reset the travel and/or force settings if there are no door issues. See adjust the travel and force limits or program the travel and force limits.
- If the opener will NOT run more than 6 to 8 inches, check the following:
- Unplug the opener, remove the battery backup if applicable.
- Check the RPM sensors wire harness for loose connections
- Verify the interrupter cup is on the motor shaft
- Verify there is no end play in the motor shaft
- Replace RPM Sensor
- Unplug the opener, remove the battery backup if applicable.
- Disconnect the garage door from the opener and cycle the opener.
- If the opener has a single click with no movement check the following in order:
- If the unit is a DC motor unit:
- DC motor wiring harness or transformer wiring harness disconnected:reconnect wiring harness.
- If the unit is an AC motor unit:
- AC motor overheated: disconnect the motor from power and wait 45 minutes for the motor to cool down.
- Defective Logic Board: Replace Logic Board.
- Defective Transformer: Replace Transformer.
- If the unit is a DC motor unit:
6 flashes
Motor Circuit Failure. Replace the receiver logic board.
- Replace the logic board because the motor itself rarely fails.
Frequently Asked Question:
Why is my Garage Door not closing, Liftmaster light blinking 10 times?
To fix this issue,
- First, locate the two photo eyes attached to your garage door and clean the lens using a soft microfiber cloth.
- Loosen the wing nut holding up the photo eye and adjust them until both sensors are properly aligned. The photo eye with the amber light sends out the light, while the green sensor is the receiver.
- If aligned correctly, the green sensor will remain on and glow steadily.
If your problem has not been fixed, the self-diagnoses LED light indicator on your opener can help you determine a possible problem and solution for your opener.
Why won't my garage door light go off?
Check the "Light" button on the panel if your door control has various functions. The control panel for your garage door is normally mounted on the inner wall. The "Light" switch button is sometimes mistakenly engaged, causing the light to stay on. To turn it off, hit it again.
How do you trick garage door sensors?
All you need to do is hold the wall button down ( do not press and release). You must hold the wall button all the way down until the garage door hits the floor then release it. If you let go of the button before the door hits the ground the sensors will kick back into action and the door will reverse.
How to fix Liftmaster error code 4-6?
it indicates that inter sensors are misaligned, or something is obstructed between two sensors. This indicates that the garage door opener will not close and that light bulbs will flash.
To Fix:
- Check to see if your safety reversing sensors are properly placed, obstructed, or out of alignment.
- Reposition both sensors to ensure that both LEDs are stable and not flashing. Make sure there is nothing dangling or hanging on the door that might interfere with the sensor's route when closing.
Other Fixes if the issue is still present:
- Check that the Amber LED (sending sensor) and Green LED (receiving sensor) are both flashing continuously.
- Align the sensors such that their lenses are pointed in the same direction.
- You might try raising the sensor slightly above the ground by adjusting the rail brackets.
- It may not detect any obstructing item beneath if you place it higher than 6 inches above the garage floor.
How to fix Liftmaster error codes 1-2?
Users will encounter Error Code 1-2 when the garage door opener detects thatthe safety sensor wires are shorted or reversed.
Symptoms of Error: The garage door opener will not close, and the opener's lights will flash or click ten (10) times.
To Fix:
Ensure the safety sensors are correctly wired to the operator and that the bare copper is not touching.
mendezanscialtat2000.blogspot.com
Source: https://home-automations.net/liftmaster-flashing-light-codes/
Belum ada Komentar untuk "Liftmaster Up Arrow Light Flashing Continuously"
Posting Komentar